3D Sci Fi Movie Maker
Home
Privacy Policy
About Galacticsoft
Contact Us
Other Sites
3D Models
3D Sci Fi Movie Maker Tutorials
3D Sci Fi Movie Maker Videos
3D Sci Fi Movie Maker Help
3D Sci Fi Movie Maker Support
Get it for Free!
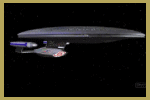
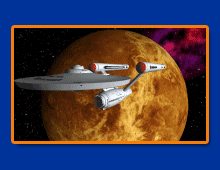
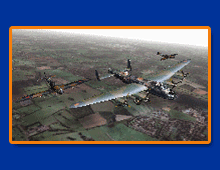
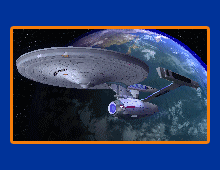
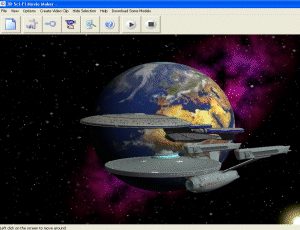
Please Check out some screen shots taken from 3D Sci Fi Movie Maker:


3D Sci Fi Movie Maker Help!
3D Sci-fi Movie Maker is a real time animation studio, capable of importing 3DS model files for animation and 3D scene development. Like any creative software capable of producing quality results, it takes a little time to learn, but the end product is well worth while.
There are many types of effects to choose from in order to create many kinds of animated sequences.
Once you have made an animation, you can then write it to an AVI which will be compatible with a whole host of video editing packages, including Microsoft Movie Maker, where you will be able to add sound and music to it.
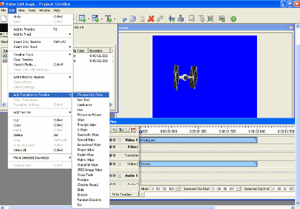
Controls
The first button will reset the scene, and create a new project.
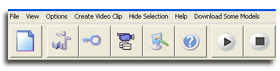
The next button will open the main control pannel. The key shaped button will open the pannel that deals with setting keyframes. You can edit the models position and rotations from here and create an animated sequence.
The camera icon opens the camera movement window. this can either set the movement of the camera to a manual movement in conjuction with the mouse, or will increment the movement presicely in conjuction with the keyframes. The next button will open a colour palette for changing the background colour. The remaining buttons are self explanatory.
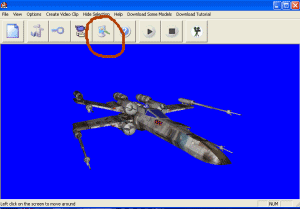
Blue Screen Editing
Blue screen backgrounds are the main stay of the video editing industry. They are generally used for super-imposing backdrops behind actors. They can also be used to layer a number of objects on top of each other and so reducing the need to create all the objects at the same time.
The effect is also know as Chroma keying and most video editing packages support it. You can use Croma Keying as a way of creating hundreds of spacships, or any type of model, in a single video clip.
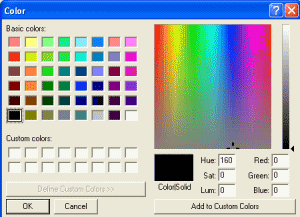
Select true blue, that should be Blue 255, Red 0, Green 0
Once you have created your sequence save the AVI. in Full Frames Uncompressed format to ensure a “lossless” quality.
You can now repeat this process with another model, or a background. A good video editing package to use is Video Edit Magic.
Using Video Edit Magic, I have loaded in two avi video clips I created and added them to the projects timeline. You will need to have the background objects on video 1 timeline and the foreground object on Video 2 timeline.
To merge the two together, simply select from the Edit menu, Add transition to timeline, Chroma Key Color, and a new edit window will appear:
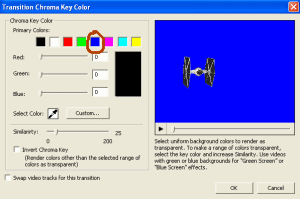
Select the Blue color palette indicated and then press OK. And a new Chroma Key transition line will appear in the time line. Then its just a matter of adjusting it to match the length of the other two time lines and you would have created your first Chroma Keying clip.
You could then go on to save this as a movie clip, preferably at full frames uncompressed and at 25 frames per second, (depending on whether you saved the previous clips at 25 fps). You could then load in the saved clip and begin the process again with the next object or model, or even a backdrop.
If you are feeling really adventurous, you could add any model animation you create using the blue screen to any home movie you have made. The possibilities are literally endless!
Creating Videos

Click on the button indicated to open color palette You can use Chroma Keying as a way of creating hundreds of spaceships, or any type of model, in a single video clip .
Creating Videos When creating a video, you will be confronted by this dialog You can create a Full Frames (Uncompressed) Video Avi by leaving the compressor selection as it is. However, depending on what video codecs you have installed on your computer, you can vary the type of compression:
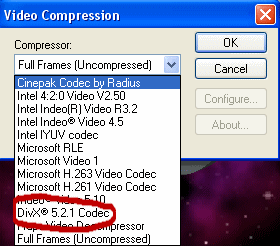
If you download DivX You will be able to create a smooth video sequence for instant viewing.
Try Downloading this Vid Clip after you have installed DivX: